Using Ad Customizers for Responsive Search Ads
Who doesn’t love automating a tedious, time-consuming task? With ad customizers for responsive search ads, you can automate ad copy-refreshing tasks. To ensure ad content is dynamic and accurate for your ad viewers.
You can start using ad customizers for responsive search ads in 3 steps.
- Set up a Google Sheets document to store your ad customizer attribute data
- Create and schedule your ad customizer uploads to run via the Google Ads interface
- Update your ad copy with the corresponding ad customizer values that you wish to use
Let’s dive in!
Setting Up Your Google Sheet
Google provides bulk upload templates you can use to not only update ad customizer attribute values but also to create new ad customizer attributes. But before we create any ad customizer attributes, think about some use cases for you or your business.
- Do you run promotions to drive sales?
- Are there issues with limited inventory with your products?
- Do product offerings change frequently?
This will help guide you as you begin configuring your Google Sheet.
Let’s take a look at our basketball business uploader template as an example (feel free to make a copy of the document to use for yourself). In our template, we establish several different ad customizer attribute names and identify their corresponding data types (there are four types: text, price, percent, and number). The names of your ad customizer attributes can be anything, but it’s probably best to keep the names simple and relevant.
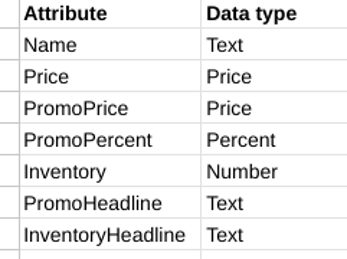
Once you have selected your ad customizer attributes, you can populate the level at which you’d like to apply your attributes. Ad customizer attributes can be applied at the account, campaign, ad group, and keyword levels.

Now you can start populating our attribute values.
To do this, you need to align the values you’d like to populate with the appropriate columns that match your ad customizer attributes, and we need to follow the appropriate naming convention for the column names, “Customizer:Name”.
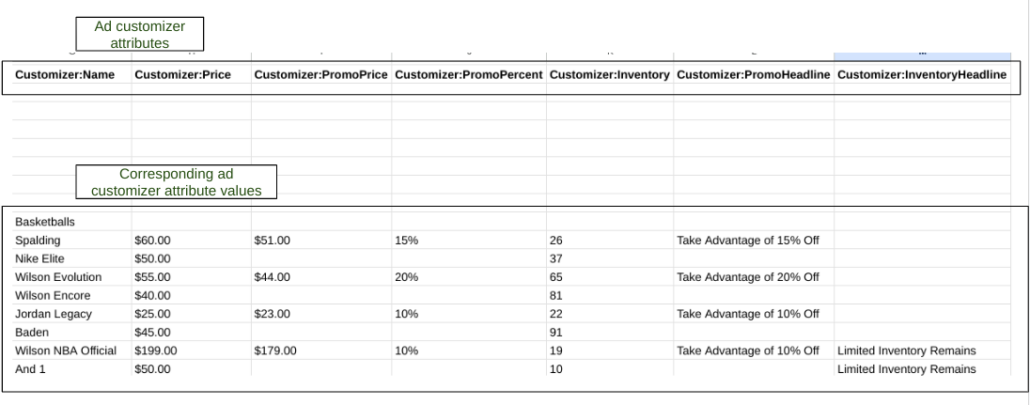
In our example template, we are pulling data into the “Basketball Business Upload” tab for our ad customizer attribute values from the “Basketball Data” tab via XLOOKUP formulas. This made-up dataset originates in the “Basketball Data” tab, but there are several ways you could import your data into Google Sheets via the IMPORTRANGE function from another Google Sheets document, or via BigQuery Connected Sheets.
Now that your values are configured in your document, you can move on to running your first bulk upload!
Run Your First Bulk Upload
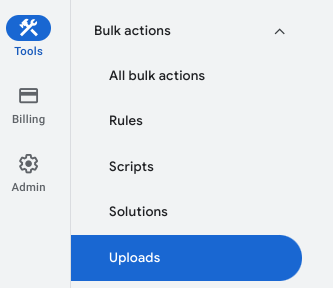
To run your initial bulk upload, navigate in the Google Ads interface to the “Bulk actions” section and select “Uploads”.
Click the blue “+” icon.
Then select “Google Sheets” from the dropdown.
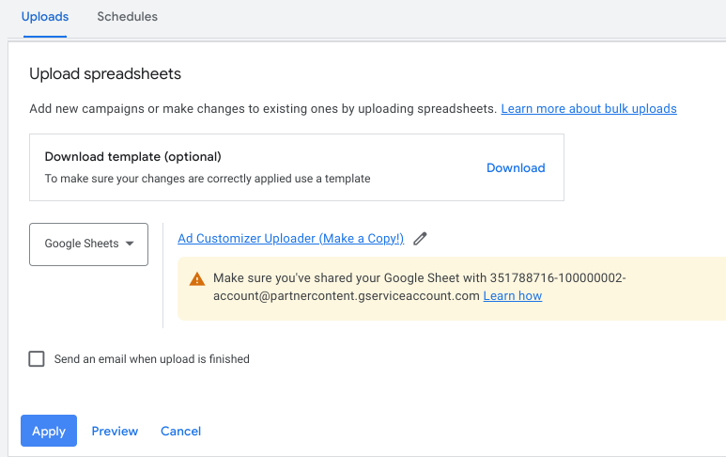
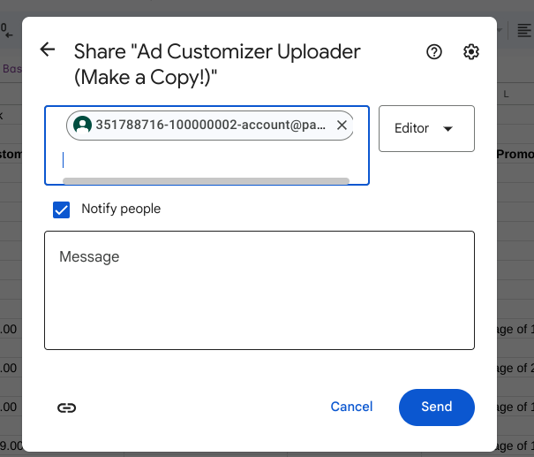
And share your Google Sheets document with the corresponding Google service account.
Now, select “Preview” to preview your bulk upload changes.

After you run the preview without any errors, set up your bulk upload to run and select “Apply”.
Your ad customizer attributes will now be created and their corresponding values will be added as well!

Schedule Your Bulk Upload
Now navigate back to the “Bulk actions” section, select “Uploads”, then select the “Schedule” tab.
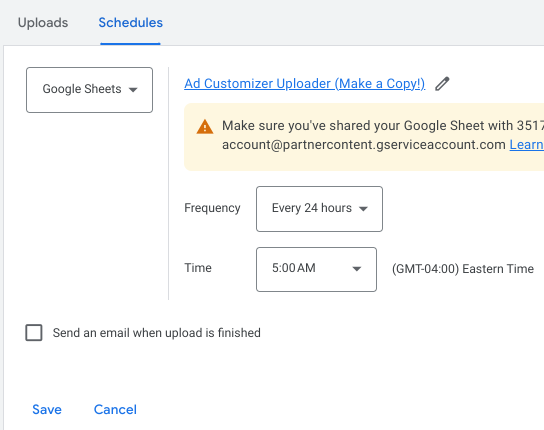
In the settings, you can decide how frequently to schedule your bulk uploads, what time of the day the upload will run, and whether or not you want to send yourself notification emails. You can schedule the upload to run every 24 hours or weekly on a specific day.
If you need to update your values more frequently than daily, you can always set up additional upload schedules. I also recommend toggling on email notifications, at least initially, to ensure that you aren’t running into errors.
Once you decide on your settings, select “Save” and your bulk upload will now be scheduled to run!
Preview Your Changes
Now that you’ve made your first upload, you’ll want to preview your changes and make sure everything is getting passed into Google Ads correctly.
You should be able to preview these changes after your first bulk upload, but it doesn’t hurt to double-check in the Google Ads interface. To preview your ad customizer attribute values, go to the level at which you applied the ad customizer attribute values. So if you applied your ad customizers at the ad group level, go to the “Ad groups” tab in your account.
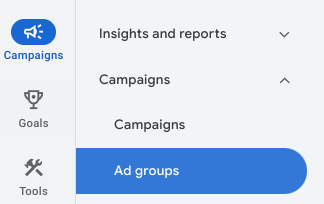
When you see your list of ad groups, you likely will not see any columns for ad customizer attributes, but you can add them by going to “Columns” and selecting “Modify columns”.
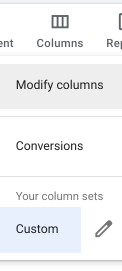
From there, select your corresponding ad customizer attributes then select “Apply”.
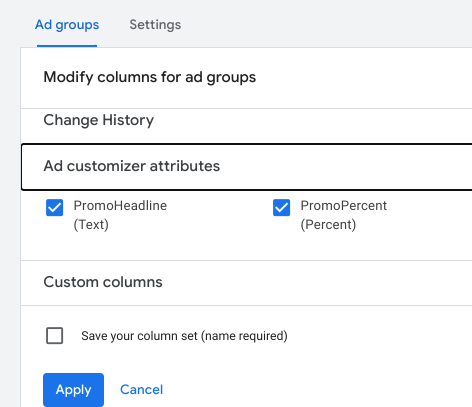
You will now be able to see your ad customizer attribute values under the new columns.
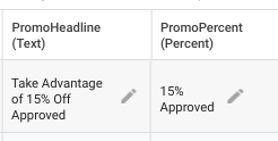
You may have noticed in our upload template that some attributes can be used in a headline or a description as an inserted value like, “Enjoy {CUSTOMIZER.PromoPercent:5%} Off” while others are configured to display an entire headline or description like the PromoHeadline attribute, “{CUSTOMIZER.PromoHeadline:New Inventory Added Daily}”.
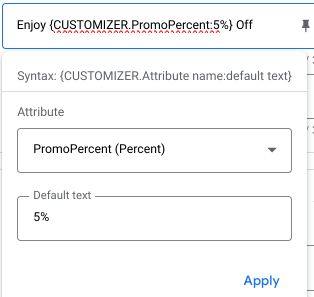
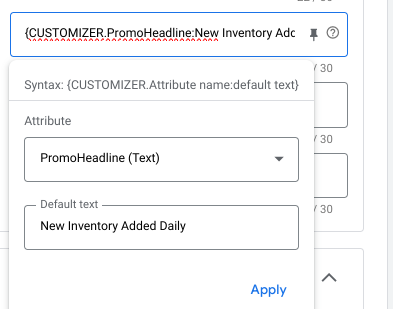
Either option will work, again it just depends on your use case and how complex you want to make your Google Sheets formulas in your upload sheet.
Update Your Ad Copy
You could update your ad copy using Google Ads scripts or the Google Ads Editor, but the bulk editing options within the Google Ads interface should be a good option for most.
To use the bulk editing options, go to your “Ads” tab and select the ads that you would like to edit.

Then select “Change ads”.
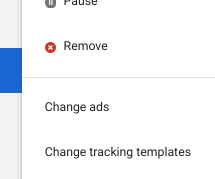
You will have several options to change your ads including “Find and replace” functionality.
But in this example, we’ll simply add one additional headline to our ads. Just be mindful that you’re following the proper syntax when leveraging your ad customizers in your ad copy, “{CUSTOMIZER.Attribute name:default text}”.
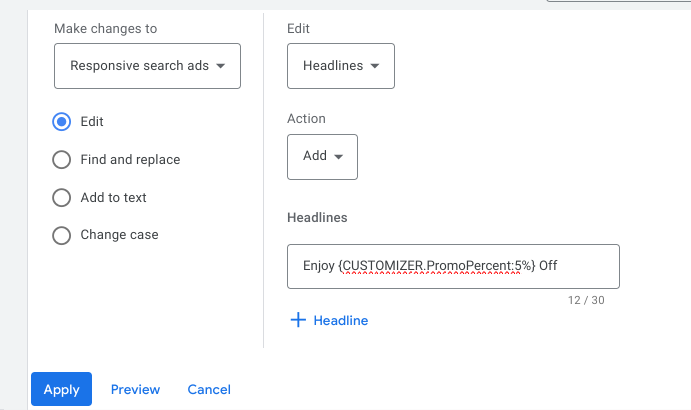
Similar to the bulk upload, you have the option to preview your changes before you make any changes. Select “Preview.” Then, select “Apply” to update your ad copy.
Wrapping Up
Ad customizers for responsive search ads can make our lives a whole lot easier as advertisers, but most importantly, we can provide the most accurate and timely information for our website visitors as possible. If you run into any issues with your setup or have any questions, please don’t hesitate to reach out.
Happy automating!
For another way to make your life easier, check out this guide to UTM parameters in GA4 so you can accurately measure your marketing campaign performance.
more like this, sign up for the monthly email newsletter.



Leave a Reply
Want to join the discussion?Feel free to contribute!