

Squarespace Blogs | 5 Basics For Publishing
You are an SEO writing expert with a command of keyword research, knowledge of appropriate title tag and meta description construction, and a steadfast commitment to your internal links to always have appropriate anchor text. Awesome. You have your blogging game-face on as you sit down at your laid back coffee spot, preparing to crank out a minimum of 600 words on a topic where you can add helpful content with a unique perspective. Check. You have your latte in hand and your laptop sticker density correctly identifies you as a digital marketing dork. Contact! But wait…you recall that this particular blog is for a new client that doesn’t have a WordPress site. It’s a Squarespace site, a less complicated CMS, but one that can still can pose some questions to those who are new to the platform. Before you abort the SEO writing mission, here are 5 basics to get you though publishing your first Squarespace blogs.
Access the Squarespace Blogs Section After Logging in
Squarespace looks a lot different than WordPress when you’re first logging in. There are no plugins and the overall menu is much more streamlined as compared to the WordPress CMS. To get to the appropriate part of the platform for Squarespace blogs, the first step is to select the “Pages” from the main navigation window on the left hand side of the page. Check out the arrow below.
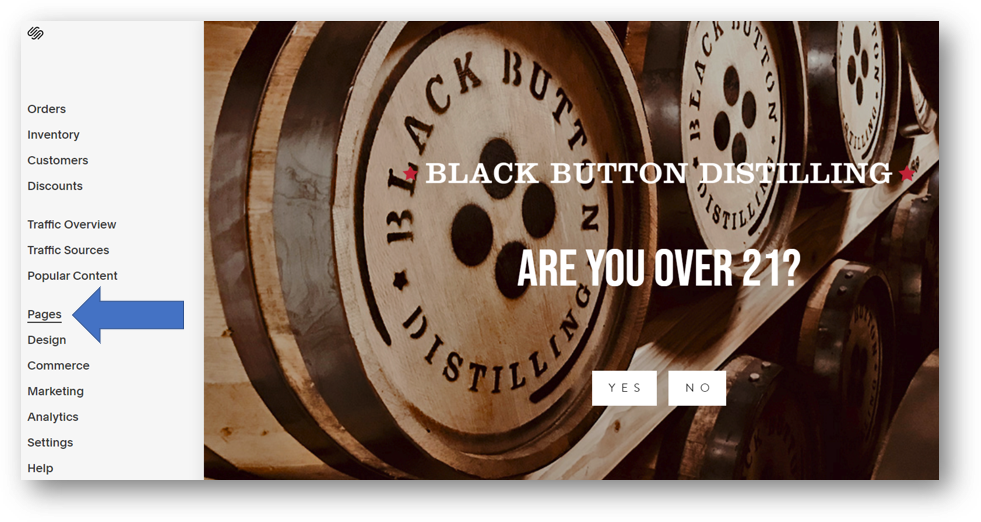
Hitting “Pages” will bring you to a list of all pages on the site, whether they are visible or not within the site navigation. Most pages correspond with an icon showing a page with a corner folded over in the upper left hand corner. You can see that icon next to the first 8 pages listed in the image below. Commerce pages have a $ sign icon and the icon for the Squarespace blogs themselves is a script “a”. Click on that “Blog” to get to where you want to go.
![]()
![]()
Begin a New Squarespace Blog
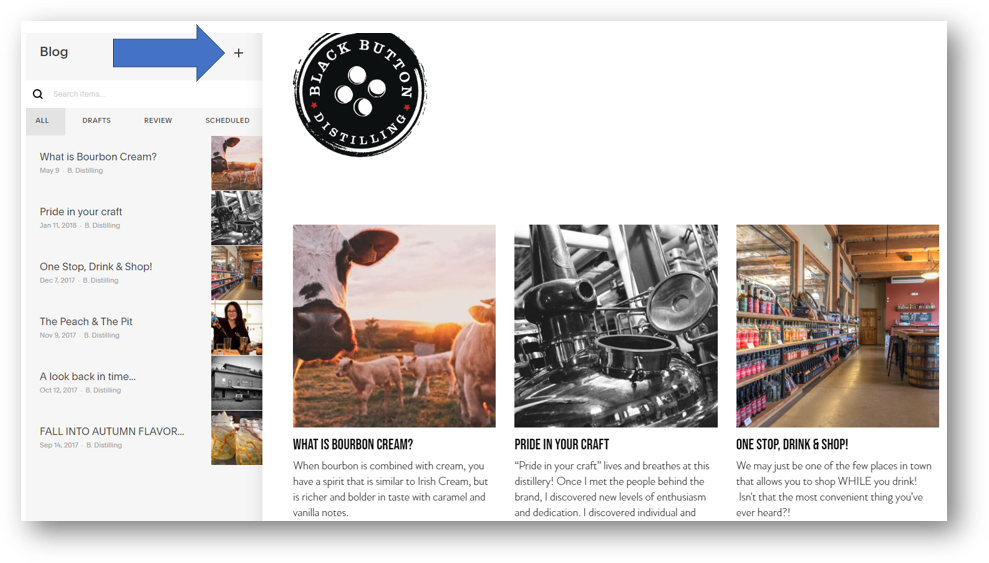
Congratulations! You’ve made it to the blog section of the site. Now, it’s time to create a new one. Spoiler alert: this part is not complicated. Simply hit the plus sign as shown below to “Add Post” and you’re in business.
To keep those online searchers happy, Google is seeking to provide the most authoritative, relevant, and helpful content in response to search queries. Writing about something where you can lend an expert perspective takes time, but in our opinion, it’s the only way to win the top results on the SERP. Creating valuable and compelling content is a critical part of the SEO services we provide for our clients. Without it, everything in the list below becomes noise.
Get Your Content in Your Blog
It’s time to get your content into your blog. We typically do our writing in Microsoft Word or some other word processing application, so at this point we’re essentially copying and pasting. If you don’t already have your content completed, you can check out our 9 steps to SEO writing before you go any further. Once the content is good to go, there are some basics to keep in mind to make sure it gets entered into Squarespace correctly.
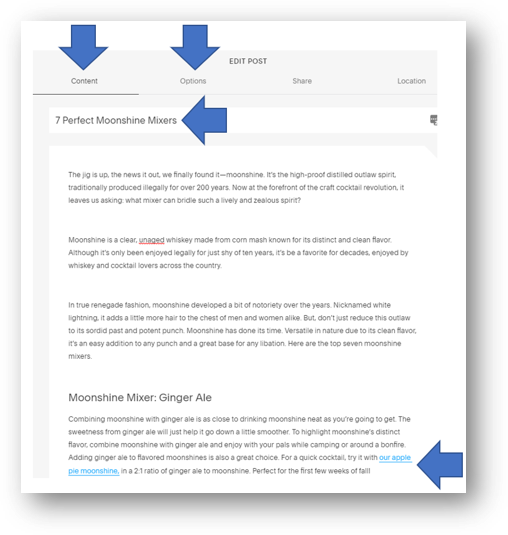
The first vertical arrow indicates the “Content” section of the blog. This is where we are in the image below and is where of the copy will be entered. The second vertical arrow showing “Options” is where we can add our image, select our Author, determine our URL, and more before we publish. We’ll go into that a bit more below. For now, let’s stick with the “Content” section.
Enter the title of your blog where the first horizontal arrow is shown below. If you don’t see you priority keyword here, consider a new title. If you don’t know what a keyword is, consider checking out our SEO services. Below the title is the main area to enter copy. Again, this is generally a copy and paste for us. The manual effort here is in regards to links and subheadings.
The first link in our blog below is shown next to the second horizontal arrow below. This is the most important link for this particular blog, and is the primary reason the blog exists: specifically, we want to increase the organic search visibility for the Moonshine product page, and are using internal linking in this particular blog (which targets “moonshine mixers” as our keyword) to help accomplish that goal. We’d be happy for readers of this blog to hop over to the product page and consider a new purchase, and as such, we won’t have any clicks on that link open a new tab for our readers.
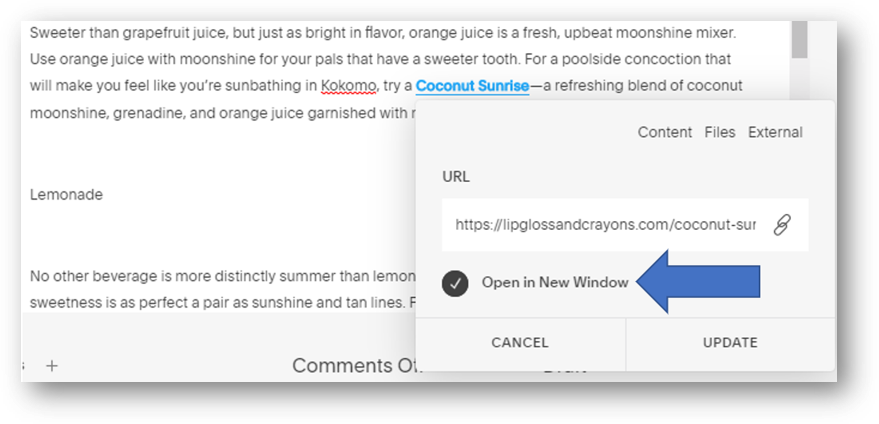
For any external links, however, we do want any clicks to start a new session in a new window. This keeps our users engaged on our own domain instead of ending their session upon any click to an external domain. To do that, simply check the “Open in New Window” radio button after entering the URL for any external link. You can check that out next to the arrow below.
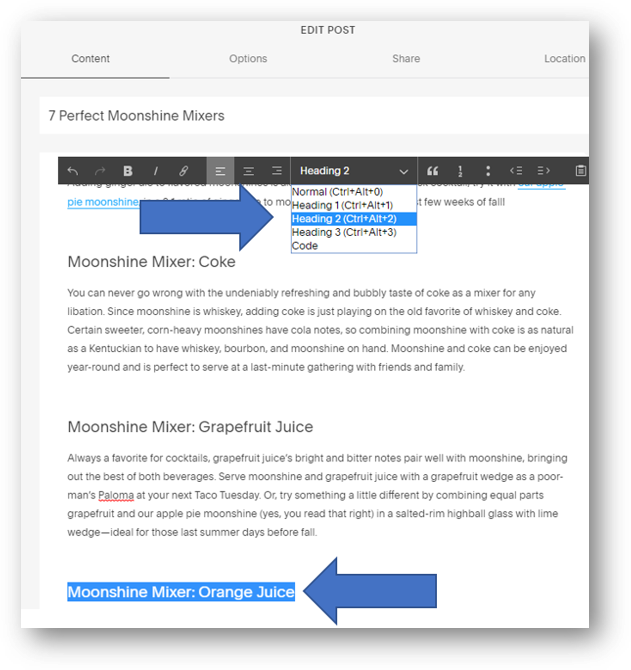
Subheadings can be important elements in optimizing a given page for SEO. In a blog or other piece of content, we always use an H1 as our primary Heading. Subheadings can help to improve the readability of content and also present an opportunity for keyword targeting. In this particular Squarespace blog (and most of our blogs) we are using H2’s as our subheadings. To make sure that is the case, we’ve simply highlighted the text of our desired H2 (second arrow below) and then used the text drop down menu (first arrow below) to select “Heading 2”.
That’s as complicated as it gets.
Add an Image and Finalize Options for Your Squarespace Blog
At this point, your copy is ready to go, your internal and external links are set up correctly, and you have any subheadings configured correctly. Nicely done! The last steps are to add an image, modify your URL, select your Author, and add a blog Exerpt. Let’s take those in order:
To add an image, simply click in the box at the top left of the screen. Check out the arrow in the top left below. Pro tip: size all of your images the same for consistency and compress the file size to keep the site running as efficiently as possible.
To change your URL, you can type in box below the “Post URL”. See this in the first arrow on the right side of the image below. Keep search engines and humans happy with a URL that is descriptive and as short as is practical. One big thing not to do is to change your URL after the blog has been published. This effectively creates a new URL to be crawled by search engines and effectively turns the first URL into a 404 error. Those 404s can be fixed with 301 redirects, but it’s always better to just avoid that mess in the first place. Always make any URL changes before publishing.
To select an author for your blog, just hit the drop-down arrow at the second arrow on the right side of the image below. Most websites will already have the preferred author created, but you can always create a new author if this isn’t the case.
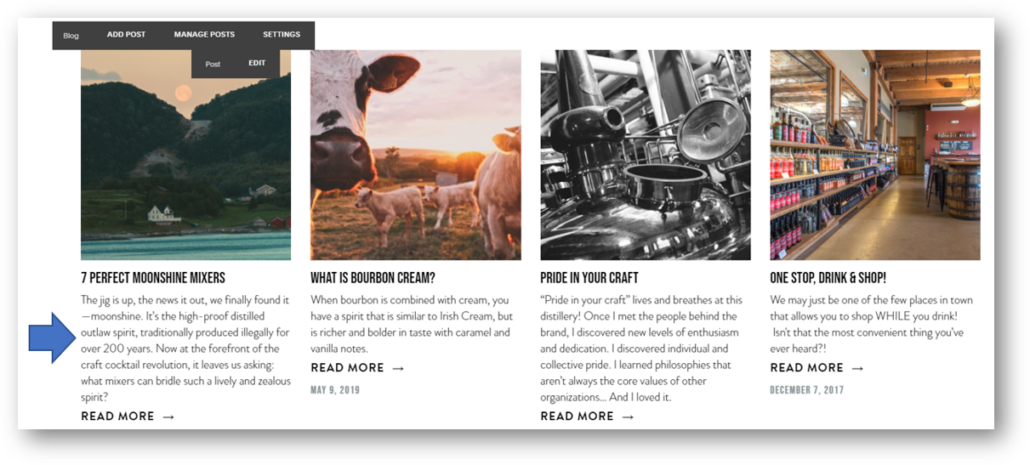
Finally, add a brief excerpt for your blog. The excerpt will be visible on the main blog page of your site. See the arrow at the bottom right in the image below to make sure you’re in the right spot.
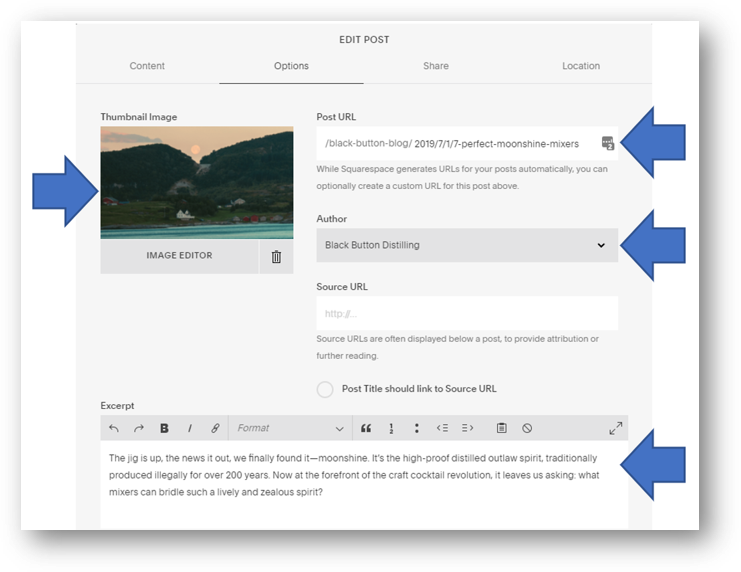
See the arrow below? That’s where your blog excerpt will show up as a preview of your blog content.
Squarespace Tags and Categories: To Tag or Not to Tag?
Just like with WordPress posts, SEO writers can use Tags and Categories in their Squarespace blogs. So what are they and should they be used?
According to Squarespace, “You can use categories and tags to organize content and help visitors find content that interests them.” Squarespace recommend using Categories conservatively and using them to divide “content by subject or by type.” The Squarespace perspective is that authors should feel free to use Tags much more liberally than Categories. According to the company’s help article (linked below), “Tags are like the original hashtag. If you can see yourself saying, “hashtag awesome” or “hashtag beach vacation,” consider making those tags.”
Woof. This sounds like total nonsense to us. The biggest reason is that all tags and categories are indexable by search engines, so every time a new tag or category or used, you are creating new URLs for the search engines to crawl. Without a very streamlined and targeted strategy, these tags and categories effectively create new pages that are light on valuable content and generally useless for anything other than causing a proliferation of new pages to be crawled. And these pages are almost all going to be very light on content, creating opportunities for duplicate content crawl errors. From our own research, we’ve found tags and categories to rarely rank high enough in organic search to drive inbound traffic. In the rare cases when they do rank, they are likely outranked by a blog article on the same domain, so they essentially just create SEO competition for a better piece of content that already exists on the domain. Our advice: save yourself and the search engines some time and processing power and skip tags and categories altogether.
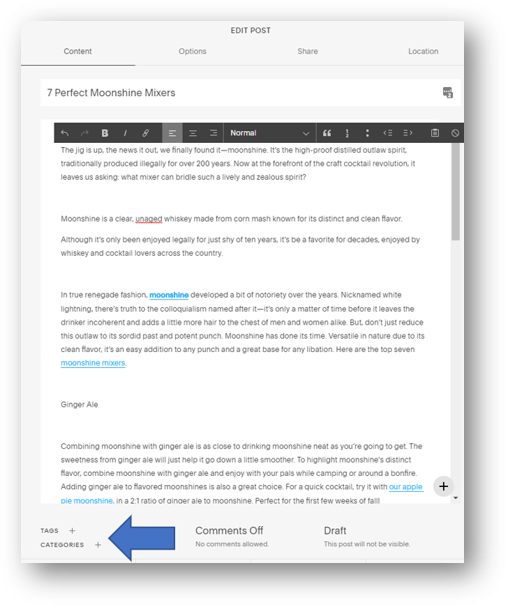
Should you choose to ignore this guidance and want to to make things a bit more complicated, know that categories must be 25 characters or less in length and tags can be up to 80 characters. More information from Squarespace here. You can find where to add Tags and Categories by following the arrow below.
That’s it! The only step left is to promote your new content. As we’ve shared before, there are a few simple and free platforms to always use to help get drive eyeballs to your new content. Here are 3 of the easiest.
- Post organically on LinkedIn
- Post organically on Facebook
- Post organically on Google My Business
Congrats! By reading this you should now feel armed to fearlessly publish Squarespace blogs. That wasn’t so bad was it? Should you have more questions, you can get in touch with us or read more about the digital marketing services we offer.
Root & Branch is a digital marketing team with operations in Pittsburgh, PA and Jacksonville, NC that provides a wide variety of digital advertising and analytics services for B2C and B2B companies. Root & Branch is a certified Google Partner agency and focuses on paid search (PPC), SEO, Local SEO, digital reputation management, digital analytics, and social media management.


Trackbacks & Pingbacks
[…] on the Root & Branch site such as social media services, location customizer for google ads, squarespace blogs publishing, and so […]
Leave a Reply
Want to join the discussion?Feel free to contribute!